A terminal-based development environment for R, Python and Bash built on Neovim, R.nvim, hlterm and Tmux. Designed for working efficiently on HPC clusters over SSH, and equally useful on personal Linux, macOS and Windows (MobaXterm/WSL) systems.
Note: This is a major update of the original Nvim-R-Tmux setup. The old instructions are preserved on the
legacybranch. Key changes:Nvim-R→R.nvim,vimcmdline→hlterm,vim-plug→lazy.nvim,init.vim→init.lua.
- Overview
- Installation
- Usage
- Step-wise install
- Updating plugins
- Uninstall
- Troubleshooting
- Platform notes
- Source credits
| Component | Purpose | Replaces |
|---|---|---|
| Neovim >= 0.10 | Editor | Vim |
| lazy.nvim | Plugin manager | vim-plug |
| R.nvim | R integration | Nvim-R |
| hlterm | Python/Bash REPL | vimcmdline |
| nvim-treesitter | Syntax parsing | — |
| neo-tree | File browser | NERDTree |
| Tmux >= 3.4 | Terminal multiplexer | screen |
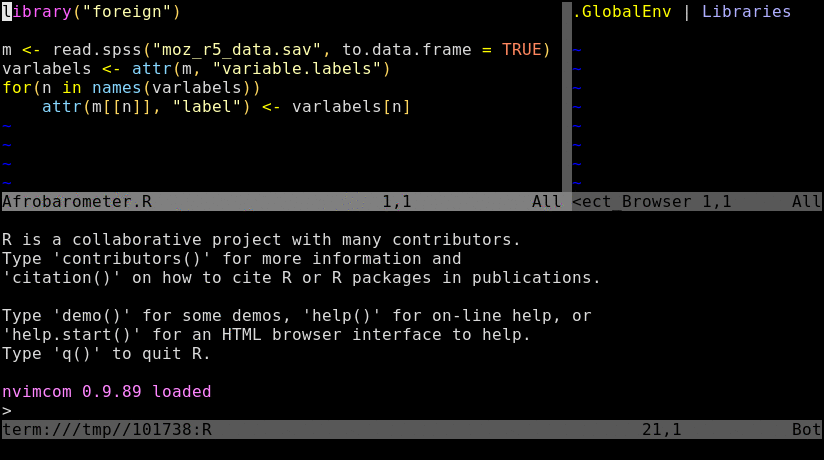
Animated screenshot of R.nvim (from R-nvim/R.nvim):
The install script configures everything in one step. It assumes Neovim
= 0.10, Tmux >= 3.4, R, and git are already available on your system (via
module loadon HPC or system install on personal systems).
# Clone this repository
git clone https://github.com/tgirke/nvim-R-Tmux.git
cd nvim-R-Tmux

# Run the install script
bash install_nvim_r_tmux.sh
The script:
- Backs up any existing
~/.config/nvim,~/.tmux.conf,~/.Rprofileand~/.bashrcwith a timestamp suffix before making any changes - Writes
~/.config/nvim/init.luawith all plugins configured - Writes
~/.config/nvim/after/ftplugin/sh_hlterm.luato fix the bash prompt when using\sin shell scripts - Writes
~/.tmux.confwith sane defaults and a default session layout - Installs the
clipOSC 52 clipboard script to~/.local/bin/clip - Prints rollback commands at the end in case you want to undo
After running the script, log out and back in (or source ~/.bashrc),
then complete the plugin install:
# 1. Open nvim — lazy.nvim will auto-install all plugins on first launch
#    (requires internet access; on HPC run this on the login node)
nvim

# 2. Wait for plugin install to complete, then run inside nvim:
#    :Lazy sync
#    :qa

# 3. Reopen nvim — everything should now be working
nvim myscript.R
Then follow the Usage section below.
On HPC clusters: make sure the required modules are loaded before running the script:
module load neovim tmux R
bash install_nvim_r_tmux.sh
And run the first
nvimlaunch on the login node, not a compute node, since compute nodes may not have internet access for plugin downloads.
| Tool | Minimum version | Check |
|---|---|---|
| Neovim | 0.10 | nvim --version |
| Tmux | 3.4 | tmux -V |
| R | any | R --version |
| git | any | git --version |
See Step-wise install below for platform-specific installation instructions for each of these.
A note on copy/paste in terminal editors
Copy/paste works differently in a terminal-based editor than in a GUI application like RStudio or a web browser. Mouse-based text selection does not work reliably inside Neovim or tmux because the terminal, tmux, and Neovim all compete to handle mouse events.
The recommended workflow is simple and consistent across all platforms:
What you want to do How to do it Copy a line in nvim yy(yank current line)Copy a selection in nvim vto select, thenyto yankPaste in nvim pCopy text in terminal Ctrl-Shift-CPaste in terminal Ctrl-Shift-VSelect text with mouse in terminal Shift+dragthenCtrl-Shift-C
Shift+dragbypasses both tmux and Neovim mouse capture and works whether mouse mode is on or off. Note however that it selects raw screen characters including line numbers and split borders, so it is best used only in a plain terminal pane, not inside the nvim editor.
yyandycopy to the system clipboard, so you can paste withCtrl-Vin any other application (browser, text editor etc.).The mouse (
Space-mto toggle) is useful for clicking between panes but not for selecting and copying text. Keep it on for navigation, use the keyboard for copy/paste.
Start a new Tmux session with the default five-window layout:
tmuxThis creates a session named work with five named windows:
| Window | Name | Purpose |
|---|---|---|
| 1 | main | default landing window |
| 2 | editor | open nvim here |
| 3 | shell | file management, job submission |
| 4 | monitor | squeue, top, log watching |
| 5 | extra | spare |
Switch between windows with Ctrl-a 1 through Ctrl-a 5.
To reattach after disconnecting from SSH:
tmux aYour session and all open windows are exactly as you left them.
Open an R script:
nvim myscript.RStart a connected R session:
\rf
This opens R in a split pane to the right. The editor and R console are now connected — code sent from the editor runs in the R pane.
Sending code to R:
| Action | Key |
|---|---|
| Send current line | Enter (normal mode) |
| Send selection | Enter (visual mode — select with v first) |
| Send entire file | \aa |
| Send current function | \ff |
| Send current chunk (Rmd/Quarto) | \ce |
| Send all chunks above cursor | \ch |
R.nvim commands:
| Action | Key / Command |
|---|---|
| Start R session | \rf |
| R help for word under cursor | \rh |
| Toggle object browser | \ro |
| View data frame | \rv |
Insert <- |
Alt - |
Insert |> |
Alt , |
| List all keybindings | :RMapsDesc |
| Show current config | :RConfigShow |
Note on HPC completion database: R.nvim provides two levels of completion:
- Session completion — functions from packages loaded with
library()work automatically and immediately. No database build needed.- Full database completion — all installed packages even if not loaded. Built automatically by
rnvimserverin the background when R starts.The database is stored in
~/.cache/R.vim/asomnils_*files, one per package. Once built it is reused in all future sessions and only rebuilt if packages are updated.On the login node startup should be fast once the cache is built. If you experience Neovim freezing on startup, add this to
~/.Rprofileto skip the slow package description part of the build:options(nvimcom.pkg.desc = FALSE)To force a full database rebuild (compute node recommended):
rm -rf ~/.cache/R.vim/    # delete old cache
srun --partition=short --mem=4gb --cpus-per-task=2 --ntasks=1 --time=2:00:00 --pty bash -l
nvim myscript.R
\rf                       # rnvimserver rebuilds database automatically
Navigate between editor and R pane:
Ctrl-w w        cycle between panes
Ctrl-h / Ctrl-l jump left / right
i               enter insert mode (in R pane)
Esc             return to normal mode
Open a Python or Bash script:
nvim myscript.py
nvim myscript.sh
Start a connected interpreter:
\s
This opens Python (for .py) or Bash (for .sh) in a split pane.
Sending code:
| Action | Key |
|---|---|
| Send current line | Enter (normal mode) |
| Send selection | Enter (visual mode) |
The same Enter keybinding works for R, Python and Bash — it is
buffer-local so R files use R.nvim and Python/Bash files use hlterm
without conflict.
Prefix key: Ctrl-a (hold Ctrl, press a, release both, then next key)
Sessions:
| Action | Key |
|---|---|
| Detach from session | Ctrl-a d |
| Reattach to session | tmux a (from shell) |
| List sessions | tmux ls |
| Switch sessions | Ctrl-a s |
| Kill current session | Ctrl-a : kill-session |
Windows:
| Action | Key |
|---|---|
| New window | Ctrl-a c |
| Next / previous window | Ctrl-a n / Ctrl-a p |
| Jump to window by number | Ctrl-a 1 … Ctrl-a 5 |
| Rename window | Ctrl-a , |
Panes:
| Action | Key |
|---|---|
| Split vertically | Ctrl-a | |
| Split horizontally | Ctrl-a - |
| Move between panes | Ctrl-a + arrow |
| Resize pane | Alt + arrow (no prefix) |
| Zoom pane (maximize/restore) | Ctrl-a z |
| Close pane | Ctrl-a x |
Other:
| Action | Key |
|---|---|
| Reload tmux config | Ctrl-a r |
| Toggle mouse on/off | Ctrl-a m |
| Scroll / copy mode | Ctrl-a [ (q to exit) |
| List all keybindings | Ctrl-a ? |
Modes:
| Key | Action |
|---|---|
i |
enter insert mode (type text) |
Esc |
return to normal mode |
: |
enter command mode |
Essential commands:
| Action | Key / Command |
|---|---|
| Save | :w |
| Quit | :q |
| Save and quit | :wq |
| Quit without saving | :q! |
| Search forward | /pattern |
| Search backward | ?pattern |
| Find and replace | :%s/old/new/gc |
| Open terminal | :terminal |
| Exit terminal mode | Esc |
| Vertical split | :vsplit |
| Horizontal split | :split |
| Maximize current split | gz |
| Equalize splits | Ctrl-w = |
| Jump between splits | Ctrl-h/j/k/l |
| Toggle mouse on/off | Space-m |
| Toggle indent lines on/off | Space-i |
| Toggle markdown view | Space-md or :RenderMarkdown disable, details here |
Toggle the file browser with zz.
| Key | Action |
|---|---|
zz |
toggle open / close |
Enter |
open file |
a |
create file or directory |
d |
delete |
r |
rename |
H |
toggle hidden files |
? |
help |
q |
close |
Hidden files (dotfiles) are not shown by default. Press H to toggle
them on or off.
Clipboard behavior depends on platform:
| Platform | Method | Mouse default |
|---|---|---|
| HPC via MobaXterm (Windows) | X11 automatic | ON |
| macOS iTerm2 → HPC SSH | OSC 52 via clip script |
ON |
| Linux desktop → HPC SSH | OSC 52 via clip script |
ON |
| Local Linux desktop | unnamedplus + xclip |
ON |
| ChromeOS Crostini | terminal Ctrl-Shift-C/V |
ON (toggle off with Space-m) |
On ChromeOS the X11 clipboard bridge is unreliable — use
Ctrl-Shift-C/V in the terminal and Space-m to toggle mouse
off when you need terminal text selection.
In Neovim, yy copies a line and p pastes — both use the system
clipboard on supported platforms. Use Space-m to toggle mouse off
when you need to select text with the mouse for terminal copy.
Follow these steps if you prefer to install each component manually, or if the quick install script does not work on your system.
Reference: https://github.com/neovim/neovim/blob/master/INSTALL.md
nvim --version # check existing versionHPC cluster:
module avail neovim
module load neovim
echo 'module load neovim' >> ~/.bashrc
Linux / ChromeOS (Crostini) / WSL:
Use neovim-releases — compiled against older glibc, works on Debian
Bullseye and ChromeOS Crostini. The main neovim releases require
glibc 2.32+ and will fail on older systems with GLIBC_2.32 not found.
- neovim-releases (recommended): https://github.com/neovim/neovim-releases/releases/latest
- neovim (newer glibc only): https://github.com/neovim/neovim/releases/latest
curl -LO https://github.com/neovim/neovim-releases/releases/latest/download/nvim-linux-x86_64.tar.gz
tar -C ~/.local -xzf nvim-linux-x86_64.tar.gz
echo 'export PATH="$HOME/.local/nvim-linux-x86_64/bin:$PATH"' >> ~/.bashrc
source ~/.bashrc
nvim --version
If you see GLIBC_2.32 not found, you used the wrong URL —
make sure it says neovim-releases not neovim.
macOS:
brew install neovimWindows (MobaXterm): MobaXterm includes a built-in X server and SSH client. Neovim runs on the remote HPC server, not locally on Windows — follow the HPC Cluster instructions above after connecting via MobaXterm.
For local use on Windows, install WSL (Ubuntu) from the Microsoft Store and follow the Linux instructions inside WSL: https://learn.microsoft.com/en-us/windows/wsl/install
Tmux 3.4 is required for OSC 52 clipboard passthrough
(allow-passthrough option). Check your version:
tmux -VHPC cluster:
module load tmux
echo 'module load tmux' >> ~/.bashrc
Linux / ChromeOS / WSL (build from source if system version < 3.4):
sudo apt install libevent-dev libncurses-dev build-essential bison
curl -LO https://github.com/tmux/tmux/releases/download/3.4/tmux-3.4.tar.gz
tar xzf tmux-3.4.tar.gz && cd tmux-3.4
./configure --prefix=$HOME/.local && make && make install
echo 'export PATH="$HOME/.local/bin:$PATH"' >> ~/.bashrc
source ~/.bashrc
tmux -V
macOS:
brew install tmuxReference: https://cran.r-project.org
HPC cluster:
module load R
echo 'module load R' >> ~/.bashrc
Linux / ChromeOS:
sudo apt install r-basemacOS:
brew install rmkdir -p ~/.config/nvim
cp init.lua ~/.config/nvim/init.luaAlso install the hlterm bash fix — this makes \s in .sh files
open a proper login shell with your normal prompt instead of a bare $:
mkdir -p ~/.config/nvim/after/ftplugin
cp sh_hlterm.lua ~/.config/nvim/after/ftplugin/sh_hlterm.lua
The init.lua template bootstraps lazy.nvim
on first launch and installs all plugins automatically. No separate
plugin manager install step is needed.
cp .tmux.conf ~/.tmux.confStart the default session:
tmuxReattach after disconnecting:
tmux aThe clip script copies text to the local system clipboard via
OSC 52
— works over SSH without X11 forwarding. Required for macOS and
Linux users connecting to HPC. Not needed for MobaXterm (uses X11
automatically).
mkdir -p ~/.local/bin
cp clip ~/.local/bin/clip
chmod +x ~/.local/bin/clip
echo 'export PATH="$HOME/.local/bin:$PATH"' >> ~/.bashrc
source ~/.bashrc
Test outside tmux:
echo "hello" | clip # then Ctrl-V in your local terminalRun on the login node on HPC (requires internet access):
nvimLazy.nvim installs all plugins on first launch. Wait for it to finish, then run:
:Lazy sync
:qa
Reopen and verify:
:checkhealth r
:checkhealth provider
:checkhealth lazy
Expected results:
checkhealth r: Neovim OK, treesitter OK, gcc OKcheckhealth provider: clipboard tool found (xclip on Linux)checkhealth lazy: lazy.nvim OK (luarocks warnings are safe to ignore)
nvim test.R:RMapsDesc # should list R.nvim keybindings
\rf # start R session
Press Enter in normal mode to send the current line to R.
nvim test.pyPress \s to start Python. Press Enter to send the current line.
nvim test.shPress \s to start Bash. Press Enter to send the current line.
colorout by Jakson Alves de Aquino colorizes R's console output (numbers, warnings, errors) in the R terminal pane. This is separate from nvim-treesitter which colorizes the R script file in the editor.
install.packages("remotes")
remotes::install_github("jalvesaq/colorout"):Lazy update # update all plugins
:Lazy update R.nvim # update a single plugin
# Neovim config, plugins, cache
rm -rf ~/.config/nvim
rm -rf ~/.local/share/nvim
rm -rf ~/.cache/nvim
rm -rf ~/.local/state/nvim

# Tmux config
rm -f ~/.tmux.conf

# clip script
rm -f ~/.local/bin/clip

# colorout R package (if installed)
Rscript -e 'remove.packages("colorout")'
Remove the ~/.bashrc block added by the install script
(lines between # --- nvim_r_tmux_env --- markers) and
the colorout block from ~/.Rprofile manually.
:RMapsDesc says "not an editor command"
R.nvim did not load. Check :Lazy and :checkhealth r.
Most common cause: nvim-treesitter not loaded before R.nvim.
Use the provided init.lua unmodified for first install.
\rf types the letter f
localleader not set. Check :echo maplocalleader — should return \.
\s does not start interpreter
Check :set filetype? (should return python or sh) and
:Lazy (hlterm should be listed).
Parser could not be created for language "r"
Run :TSInstall r and :TSInstall rnoweb, then restart Neovim.
nvim-treesitter configs module not found
Wrong branch. Fix:
rm -rf ~/.local/share/nvim/lazy/nvim-treesitterThen :Lazy install. The init.lua pins branch = "master".
allow-passthrough invalid option in tmux
Tmux version is below 3.3. Install tmux 3.4 from source (see Step 2).
GLIBC_2.32 not found when running nvim
Using the wrong release. Use neovim-releases not neovim (see Step 1).
Colors look wrong
Add export TERM=xterm-256color to ~/.bashrc.
HPC clusters: run first plugin install on the login node. Load
neovim, tmux and R modules before launching nvim. Add module load
commands to ~/.bashrc.
macOS: install Xcode command line tools first (xcode-select --install). Use iTerm2 for best OSC 52
clipboard support.
Windows (MobaXterm): MobaXterm has a built-in X server — clipboard
works automatically via X11, no clip script needed. Enable clipboard
in MobaXterm: Settings → X11 → Clipboard → enabled.
Linux desktop: install xclip (sudo apt install xclip).
clipboard=unnamedplus in init.lua handles the rest locally.
Use clip script for SSH sessions to HPC.
ChromeOS (Crostini): use neovim-releases tarball. Install tmux
3.4 from source (system tmux is too old). Use Ctrl-Shift-C/V for
terminal copy/paste. Toggle mouse with Space-m.
This setup is built on and derived from the following projects. Please consult these upstream sources when things change:
| Component | Author(s) | Source |
|---|---|---|
| Neovim | Neovim contributors | https://github.com/neovim/neovim |
| Neovim install guide | Neovim contributors | https://github.com/neovim/neovim/blob/master/INSTALL.md |
| Neovim releases (current glibc) | Neovim contributors | https://github.com/neovim/neovim/releases |
| Neovim releases (older glibc) | Neovim contributors | https://github.com/neovim/neovim-releases/releases |
| R.nvim | Jakson Alves de Aquino & contributors | https://github.com/R-nvim/R.nvim |
| R.nvim documentation | Jakson Alves de Aquino & contributors | https://github.com/R-nvim/R.nvim/blob/main/doc/R.nvim.txt |
| R.nvim wiki | R-nvim contributors | https://github.com/R-nvim/R.nvim/wiki |
| hlterm (replaces vimcmdline) | Jakson Alves de Aquino | https://github.com/jalvesaq/hlterm |
| lazy.nvim | Folke Viegas | https://github.com/folke/lazy.nvim |
| nvim-treesitter | nvim-treesitter contributors | https://github.com/nvim-treesitter/nvim-treesitter |
| neo-tree.nvim | Michael Sloan & contributors | https://github.com/nvim-neo-tree/neo-tree.nvim |
| indent-blankline.nvim | Lukas Reineke | https://github.com/lukas-reineke/indent-blankline.nvim |
| kanagawa.nvim | rebelot | https://github.com/rebelot/kanagawa.nvim |
| colorout | Jakson Alves de Aquino | https://github.com/jalvesaq/colorout |
| Tmux | Nicholas Marriott & contributors | https://github.com/tmux/tmux |
| Tmux manual | Tmux contributors | https://man.openbsd.org/tmux |
Prior art this setup builds on:
- Original Nvim-R-Tmux tutorial by Thomas Girke (legacy branch): https://github.com/tgirke/nvim-R-Tmux/tree/legacy
- GEN242 course Linux/HPC tutorial (UCR): https://girke.bioinformatics.ucr.edu/GEN242/tutorials/linux/linux/
- UCR HPCC terminal IDE manual: https://hpcc.ucr.edu/manuals/hpc_cluster/terminalide/