Copyright (c) 2024 mirido All rights reserved.
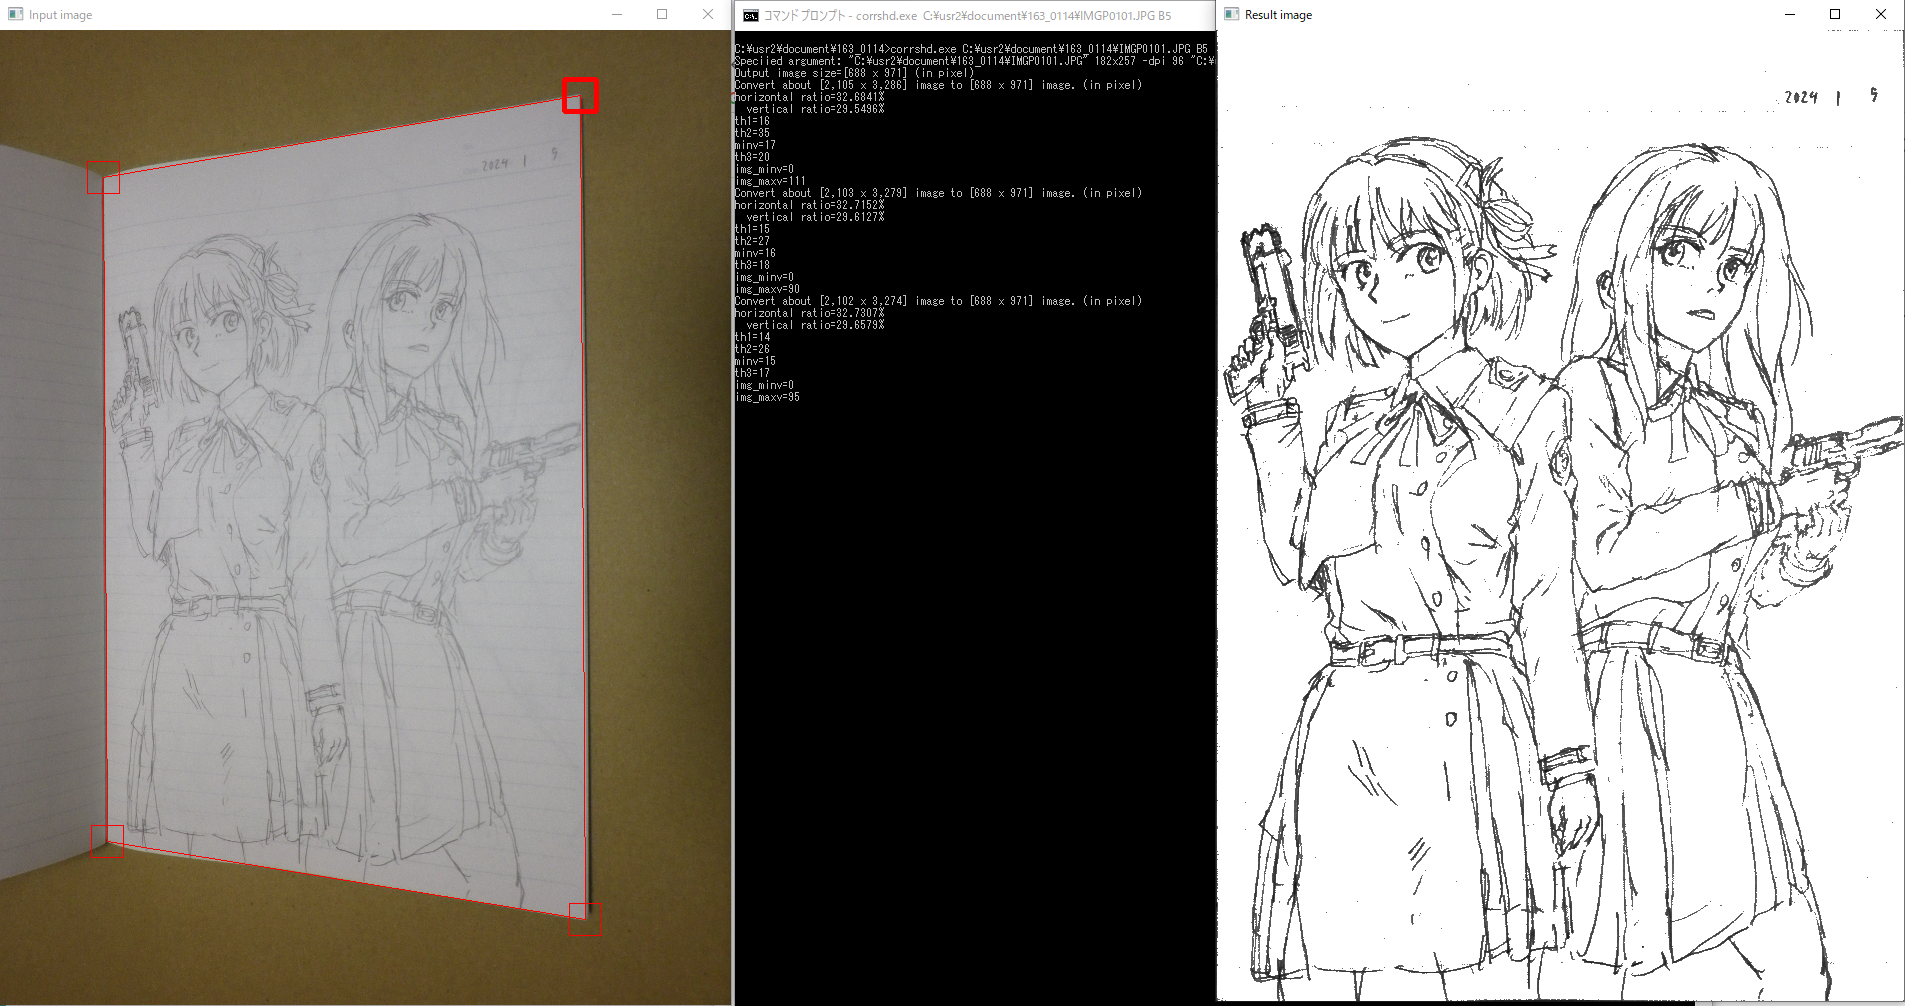
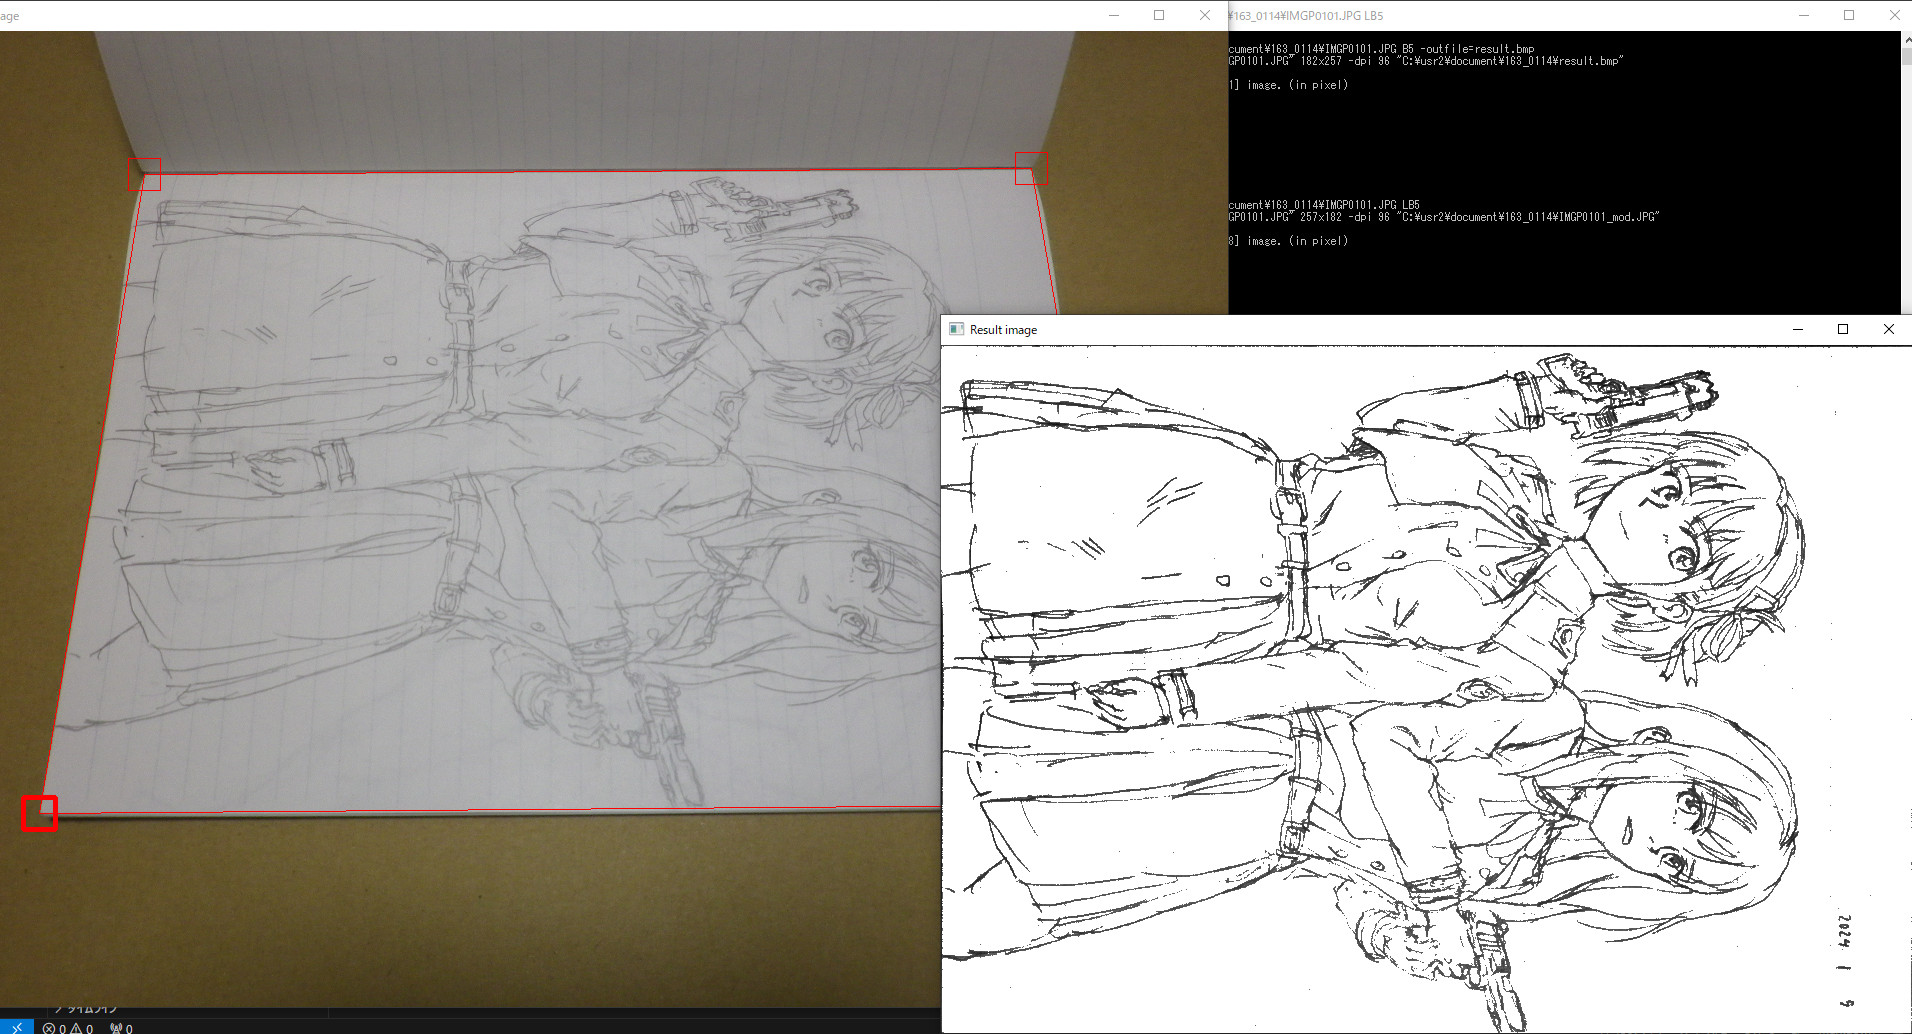
The left side is the input image, the right side is the image after automatic correction.
This program captures a specified input-image ROI (region of interest) and corrects for perspective distortion, uneven brightness, and line shading. The correcting algorithm is particularly suitable to capturing hand-drawn line drawings.
OS: Windows 10 Pro 22H2 (build 19045.3930)
Processor: Intel(R) Core(TM) i7-6700 CPU @ 3.40GHz
Memory: 32 GB
I think it probably works on 64-bit windows PC other than abobe, but I haven't tested it.
-
Install corrshd.exe in your PC. (See described steps later.)
-
Take a photo of the handwritten line drawing you want to capture with your smartphone or digital camera.
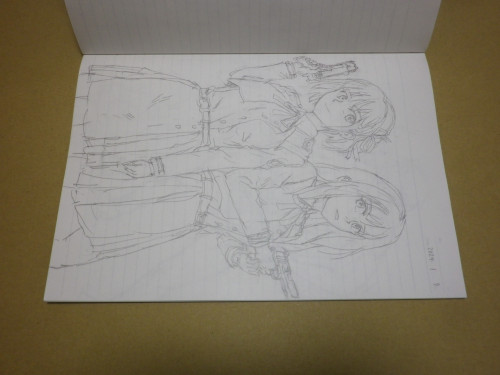
This example is taken at a resolution of 4288x3216.
Target drawing size is the standard paper size B5 (182x257 in mm).
You can take the photo in any direction. Choose the direction that is easy to shot.
Instead, try to make the lighting as uniform as possible. (See described examples later.)
-
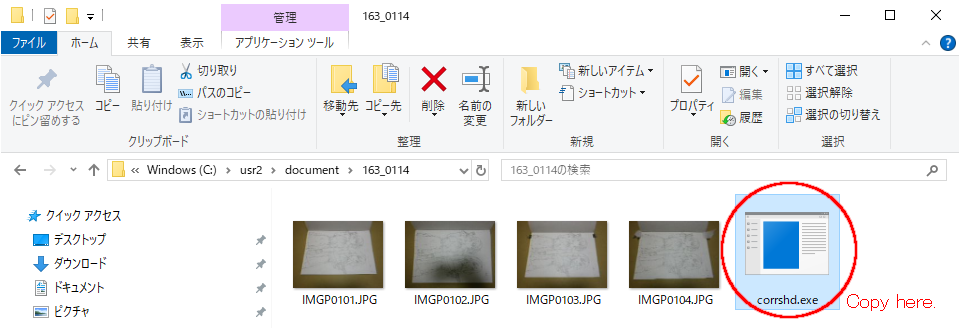
Copy the taken image file to an appropriate directory on your PC.
In this example, it is assumed to be copied to
C:\usr2\document\163_0114\IMGP0101.JPG . -
Type the following command into the command prompt.
Those command's arguments are file path to the input image file and physical dimensions of the drawing.
corrshd.exe C:\usr2\document\163_0114\IMGP0101.JPG B5
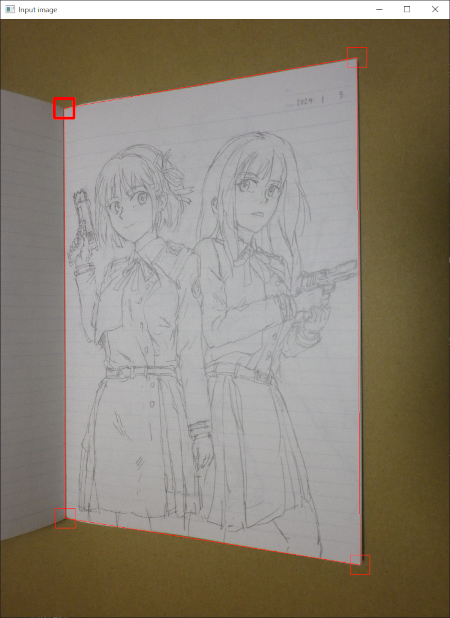
- The photo will be displaied on the screen, so use your mouse to click on the four corners of the target drawing to select it.
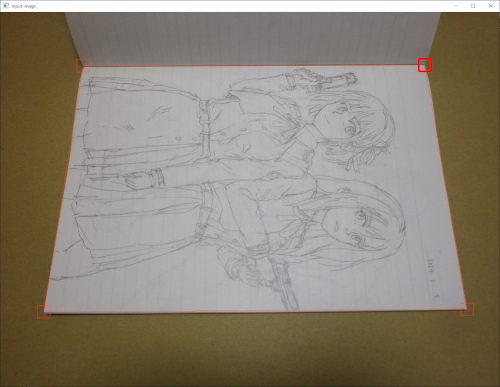
You can fine-tune the corner position using the cursor keys.
The position of the corner in a thick red rectangle marker will be moved.
Also, if you press the TAB key, the thick red marker will be switched to the next corner.
- The selected target is on its side, so press "R" (Shift+"r") to rotate it 90 degrees counterclockwise.
(If you just press "r" key, the selected target will be rotated 90 degrees clockwise.)
- Press "s" key. Press the "s" key. Then, the target line drawing (the area enclosed by clicking the corner above) will be automatically corrected.

- The image file of the correction results is saved, so retrieve it.
Since the original image file is C:\usr2\document\163_0114\IMGP0101.JPG ,
the correction result is saved as C:\usr2\document\163_0114\IMGP0101_mod.JPG
in this example.
(You can change save destination directory, output file name, and image format using the options described later.)
This program is just a single EXE file named "corrshd.exe". (OpenCV is statically linked to the EXE file. It is not in DLL form.) Therefore, you can install it using either of the following methods:
Copy corrshd.exe to an appropriate directory and set the PATH environment to it.
Copy corrshd.exe to the directory where the photo image file is placed as below.
And use program there.
If you want to build this program from source code, first download OpenCV 4.8.0 and generate the solution by specifying BUILD_SHARED_LIBS=OFF with CMake.
After that, when you build the generated solution, a static link library will be built.
Then follow the readme.txt in the directory $(SolutionDir)opencv .
If you want to more fine-tune the corners of the target drawing, you can adjust the corner position pixel by pixel after pressing the "z" key.

Press the "z" key again to return to full view.
- Double click the file
index.htmlin workspace.
(Or open the html with Live Server on VSCode.)
Lighting first! Avoid casting shadows on target drawing. If you are too particular to shot the target drawing from directly in front, you will end up as shown in following NG example.
It's much better to take a photo from an angle instead of casting a shadow.
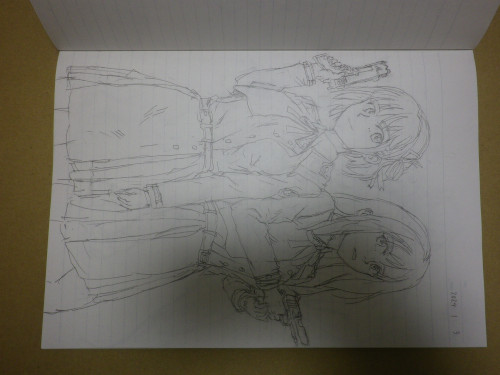
NG!
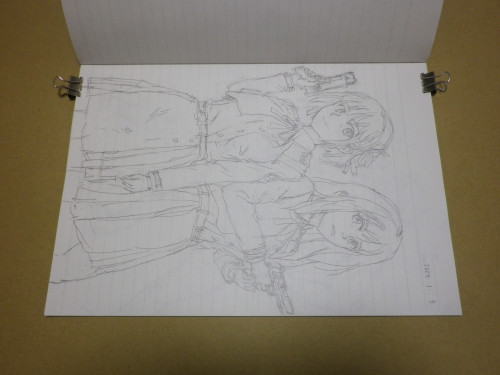
GOOD.
If an object that is too dark falls inside the four corners you clicked, its black color of that object will be used as the standard for automatic correction, and the handwritten lines will become blurred.
NG! Two clips are shot in too dark.
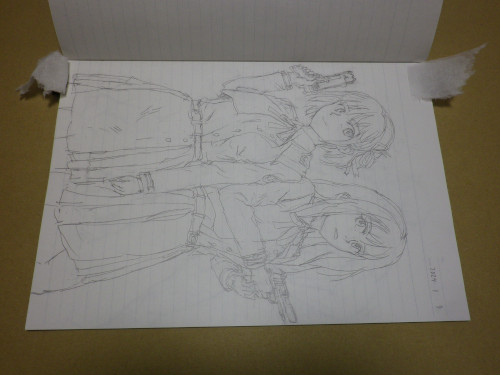
Countermeasures were taken for above NG case
The darkness is alleviated by covering it with white paper.
Alternatively, if you don't feel like it's a hassle, you can delete the clips using software such as GIMP.
The image format is determined by extension in file name.
If you start the program by giving only the name of the input image file as shown below, the image file resulting from automatic correction will be saved in the same image format.
corrshd.exe C:\usr2\document\163_0114\IMGP0101.JPG B5
If you want to use different image formats for the input and output files, use the -outfile option to explicitly specify the output file name along with the desired extension.
Example:
corrshd.exe C:\usr2\document\163_0114\IMGP0101.JPG B5 -outfile=result.png
Note: If the file name specified with the outfile option does not include a directory path, it will be saved in the same folder as the input file.
Add "L" prefix before the standard size name to specify Landscape.
For example, if the size is B5 size turned sideways, specify "LB5".
Example:
corrshd.exe C:\usr2\document\163_0114\IMGP0101.JPG LB5
Instead of the standard size name, specify the size in the format "<width in mm>x<height in mm>".
Example:
corrshd.exe C:\usr2\document\163_0114\IMGP0101.JPG 182x257
By specifying the decimal point, you can also specify increments smaller than 1 mm.
Example:
corrshd.exe C:\usr2\document\163_0114\IMGP0101.JPG 123.5x567.8
Usage: corrshd.exe [params] image-file roi-size

        -?, -h
                print this message
        --cutoffonly
                do nothing other than perspective correction
        --dpi (value:96.0)
                output resolution in dot per inch
        --outfile
                output image file name

        image-file
                image file to be corrected
        roi-size (value:B5)
                physical size of ROI
Hot keys:
        ESC          - quit the program
        r            - rotate input-image 90 degrees clockwise
        R            - rotate input-image 90 degrees counterclockwise
        z            - zoom in or out the input-image (toggled)
        (cursor key) - move the current corner point of ROI (range of interest) in pixel-wise
        TAB          - switch the current corner point of ROI to neighbor
        s            - correct the input-image ROI and save result
Copyright (c) mirido. All rights reserved.
Licensed under The 3-Clause BSD License.
This program incorporates material as listed below or described in the code.
- @opencv/opencv 4.8.0 - Apache License Version 2.0
https://github.com/opencv/opencv
See also ThirdPartyNotices.txt for more detail.