A supervised machine learning model designed for detecting NMAP port scanning, developed as part of a university project.
This project aims to build a supervised machine learning model to detect real-time NMAP port scanning activities.
In many cyber-attacks, the initial step often involves port scanning using tools like NMAP. Detecting such scans can be challenging because network packets carry extensive information, and a single packet isn't enough to confirm an NMAP scan attempt.
To address this, this project proposes a machine learning-based approach for identifying TCP port scans initiated by NMAP.
The model will detect the following TCP attack types: normal TCP scan, Stealth Scan, FIN Scan, NULL Scan, XMAS Scan.
How the interceptor.py collects all TCP flags can be summered in the following scheme.

All this attack data are collected by the interceptor.py (monitor) which listens for coming connection on a specific ip address.
In the project the following files have the described functions:
interceptor.py-> monitor for collecting dataalgo_chooser.py-> script for choosing the best machine learning algorithminjector.py-> injects nmap scans or run normal http requestsclassifiers.py-> define a big list of classifiers foralgo_chooser.pydataset_and_train.py-> create a dataset locally with bad and good data and produce a model trained on such datanoiser.py-> helper script for sending normal http requestsdetector.py-> runs a real-time demo of the model using previously mentioned scripts internallyexport_model.py-> utility for model exportationmodeldirectory -> contains exported modelmerger.py-> merges 2 datasets in one single datasetdatasets/delayed/merged.csv-> contains just another dataset for calculating accuracy and other statsdatasets/train/merged.csv-> contains the datasets used for training the modeldatasets/runtime-> contains generated runtime datasets when runningdetector.py
Warning
The entire software is designed for running on a Linux environment however the only changes needed for running on another operating system are interface names.
For example, windows does not have lo loopback interface, as well as ip addresses must be adapted.
This disclaimer has been inserted because I noticed the usage of other operating systems during the course lectures. Running the detector.py on a virtual environment should work because everything is set to run on the localhost interface.
Install dependencies with:
   python3.11 -m venv venv && \ # python3.13 has been tested to have some problems when trying to install catboost
   source venv/bin/activate && \
   pip install -r requirements.txt # this is full requirements for running algo_chooser.py too, if you want to skip it install requirements-minimal.txt instead
Warning
cargo (rust) may be needed for catboost ML model.
Use this script to install it curl --proto '=https' --tlsv1.2 -sSf https://sh.rustup.rs | sh (Use default settings)
Understanding TCP connections is important for building the dataset. When a TCP packet is sent over the network, it carries specific flags that facilitate the 3-Way Handshake. NMAP can manipulate these flags to evade detection while performing rapid port scans. We cannot create a dataset where each row of the dataset represents a packet since for detecting NMAP, multiple packets are needed, so the idea:
- Session-Based Rows: Instead of logging each packet individually, each row in the dataset represents a session (requests + responses).
- Flag Summation: Flags (
SYN,ACK,FIN,RST,URG,PSH) are aggregated across the same session. For example:- If a
SYNpacket is sent byNMAPand anotherSYNis sent by the host in the response (whatever the port is closed or opened), theSYNcolumn will record a value of2because of their sum. - The dataset contains 6 (
SYN,ACK,RST,FIN,URG,PSH) out of 9 TCP flags. NMAP uses those flags, but in the case of other new attacks, the dataset can be rebuilt using other TCP flags, too.
- If a
- Duration feature:
start_response_time, andend_response_timewill be set to 0 if only a packet has been found in the entire window session. In this case, the duration will be onlyend_request_time-start_request_timeotherwise the session duration isend_response_time-start_request_time
start_request_time,end_request_time,start_response_time,end_response_time,duration,src_ip,dst_ip,src_port,dst_port,SYN,ACK,FIN,RST,URG,PSH,label

2025-01-15 12:49:08.025898,2025-01-15 12:49:08.025898,2025-01-15 12:49:08.025946,2025-01-15 12:49:08.025946,4.8e-05,"['172.31.0.2', '172.31.0.1']","['172.31.0.2', '172.31.0.1']","['52666', '22']","['52666', '22']",1,1,0,1,0,0,1-
Sessions are grouped using
src_port, anddst_porttuple as keys. However, these grouping keys, along withsrc_ipanddst_ipfeatures, are excluded and not necessary from the model's training phase. -
The
durationfeature provides valuable information for distinguishing between legitimate traffic andNMAPscans, as legitimate HTTP requests may exhibit similar flag behaviour but differ in timing. -
The session window in
interceptor.pyis set to 0.5 seconds by default, as this is typically enough to capture anNMAPscan attempt on a single port.
More technical explanations are present via comments in interceptor.py. The script takes a while for writing succesfully all the data when a lot of requests are performed.
Note
During the data collection, some ports were opened intentionally on the host to differentiate some rows in the dataset. For example, an HTTP server on port 1234 has been opened using the following method: python3 -m http.server 1234 plus, eventually other ports that had already been opened from other services between the range 0-5000.
The following commands were run from the container called traffic_generator (the container) having the sudo python3 interceptor.py running locally.
nmap -sT 172.31.0.1 -p 0-2500 # TCP Scan
nmap -sS 172.31.0.1 -p 0-2500 # Stealth Scan
nmap -sF 172.31.0.1 -p 0-2500 # FIN Scan
nmap -sN 172.31.0.1 -p 0-2500 # NULL Scan
nmap -sX 172.31.0.1 -p 0-2500 # XMAS Scan
The result is the creation of bad.csv
Then the script noiser.py was used for generating good.csv
The final dataset consists of a merge (merged.csv) used for training the model:
bad.csv: Sessions labelled as1(NMAPtraffic).good.csv: Sessions labelled as0(legitimate traffic).
The XGBClassifier was selected as the final model due to its reliable performance in key areas:
- High accuracy score (
~0.99) - Fast prediction speed (
~4mson average for24.511rows) - High MCC score (
~0.98)
The dataset generated for training purposes contains a balanced example of normal/anomaly behaviours, half normal and half anomalies, which get shuffled during the dataset splitting phase before to reach the training phase. Thus, accuracy is an important statistic metric that must be considered in this case.
MCC should normally be preferred when unbalanced datasets are present. This is not our case, but it is taken into account even if it has a minor weight in the final machine-learning model choice.
The prediction time played a significant role in choosing this model, as it allows efficient analysis of large volumes of network traffic in real-time at reasonable times. The RandomForestClassifier is pretty similar in accuracy (maybe even better sometimes for some millis), but it has a slower prediction time in average of ~23ms compared to ~4ms of XGBClassifier. Of course it's useless to underline that even if DeepSVDD predicts in 1ms, given it's low accuracy rate it cannot be even considered. The XGBClassifier uses an internally gradient-boosted (boosting) metalearner which in turn uses decision trees. The great optimization given by the meta-learner layer allows us to obtain a significant improvement in performances in the training and prediction phases maintaining the high accuracy score provided by the decision tree classifier.
Dataset loaded with 24511 records.
+------------+-----+-----+-----+-----+-----+-----+--------+
| Duration   | SYN | ACK | FIN | RST | URG | PSH | Label |
|------------|-----|-----|-----|-----|-----|-----|-------|
| 0.000048   | 1   | 1   | 0   | 1   | 0   | 0   | 1     |
| 0.000016   | 1   | 1   | 0   | 1   | 0   | 0   | 1     |
| 0.000015   | 1   | 1   | 0   | 1   | 0   | 0   | 1     |
| 0.000014   | 1   | 1   | 0   | 1   | 0   | 0   | 1     |
| 0.000015   | 1   | 1   | 0   | 1   | 0   | 0   | 1     |
+------------+-----+-----+-----+-----+-----+-----+--------+
KNeighborsClassifier (n_estimators=N/A): Accuracy: 0.9910, Train time: 13ms, Prediction time: 271ms, MCC: 0.982114, TP: 1238, TN: 1192, FN: 18, FP: 4
....
RandomForestClassifier (n_estimators=210): Accuracy: 0.9902, Train time: 650ms, Prediction time: 23ms, MCC: 0.980464, TP: 1238, TN: 1190, FN: 18, FP: 6
....
XGBClassifier (n_estimators=210): Accuracy: 0.9910, Train time: 86ms, Prediction time: 4ms, MCC: 0.982114, TP: 1238, TN: 1192, FN: 18, FP: 4
....
DeepSVDD (n_estimators=N/A): Accuracy: 0.6970, Train time: 22739ms, Prediction time: 1ms, MCC: 0.492361, TP: 526, TN: 1183, FN: 730, FP: 13
....
----------------------------------------
Best Classifier based on Accuracy
Classifier: XGBClassifier
n_estimators: 210
Accuracy Score: 0.9910
----------------------------------------
Best Classifier based on MCC
Classifier: XGBClassifier
n_estimators: 210
MCC Score: 0.982114
----------------------------------------
Best Classifier based on prediction time
Classifier: DeepSVDD
Time : 1.000000ms
The training dataset, datasets/train/merged.csv, is generated using the following steps:
- Create an isolated Docker environment for sending clean packets:
docker compose up --build -d
- Access the container:
or
docker attach traffic_generator
docker exec -ti traffic_generator /bin/bash - Run the interceptor on the host from another terminal:
sudo python3 interceptor.py
- Before to run, adjust:
interface: Docker network interface namescanner_ip: IP assigned totraffic_generatoroutput_file: Output CSV file pathlabel:0for legitimate traffic,1forNMAPscans
- Before to run, adjust:
- Run
NMAPscans from the container:nmap -sT 172.31.0.1 -p 0-2500 nmap -sS 172.31.0.1 -p 0-2500 nmap -sF 172.31.0.1 -p 0-2500 nmap -sN 172.31.0.1 -p 0-2500 nmap -sX 172.31.0.1 -p 0-2500
- Run noise traffic for legitimate requests, from the container:
cd /tmp/temp python3 noiser.py - Merge datasets:
cd datasets python3 merger.py - Choose the model:
python3 algo_chooser.py
- Train and export the model
python3 export_model.py
A delayed dataset can be created by introducing delays between requests:
nmap -p 1-5000 --scan-delay 1s 172.31.0.1You can also adjust the delay in legitimate requests by modifying SLEEP_SECOND in noiser.py.
With this dataset, the results are a little different and worse.
The reasons why this happens are the following:
- Here we have a minor number of data since it takes some hours to construct this dataset.
- We added a scan delay that introduces a second delay between each Nmap attempt.
- The attack type used by Nmap using the above command is a
Stealth Attackby default, so flags betweenHTTPnormal requests andStealth Attacksare practically the same, the only information affordable is the duration (the backup feature introduced for these situations, when distinguish anomaly/normal packets using flags is impossible).
Given this 3 points above, and relying only on duration feature in these kind of situation, an accuracy of ~90% seems quite reasonable.
We still continue to prefer XGBClassifier for the same reasons discussed for the train dataset.
Dataset loaded with 10000 records.
....
RandomForestClassifier (n_estimators=210): Accuracy: 0.8940, Train time: 483ms, Prediction time: 20ms, MCC: 0.789968, TP: 436, TN: 458, FN: 70, FP: 36
....
XGBClassifier (n_estimators=210): Accuracy: 0.8940, Train time: 52ms, Prediction time: 4ms, MCC: 0.789968, TP: 436, TN: 458, FN: 70, FP: 36
....
DeepSVDD (n_estimators=N/A): Accuracy: 0.4833, Train time: 10273ms, Prediction time: 1ms, MCC: 0.270419, TP: 173, TN: 376, FN: 579, FP: 8
----------------------------------------
Best Classifier based on Accuracy
Classifier: KNeighborsClassifier
n_estimators: N/A
Accuracy Score: 0.8990
----------------------------------------
Best Classifier based on MCC
Classifier: KNeighborsClassifier
n_estimators: N/A
MCC Score: 0.798304
----------------------------------------
Best Classifier based on prediction time
Classifier: DeepSVDD
Time : 1.000000ms
The detector.py represents the live-demo for NMAP attacks detection.
The host is required to having nmap and tshark (wireshark on windows) installed.
Depending on your distro
sudo apt update -y && sudo apt install nmap -y
sudo pacman && sudo pacman -S nmap
flatpak install nmap
You need to install tshark for pyshark
sudo apt update -y && sudo apt install tshark -y
sudo pacman && sudo pacman -S tshark
At this point you need at least minimal requirements (first define a virtual env)
pip install -r requirements-minimal.txtCaution
This is important. The duration feature is system depended and is calculated using time differentials on a given local system.
Since on another system, duration feature can be slightly different because of pyshark times, the behaviour used in the pre-trained model (and so the live demo detector.py) can be affected by this.
A solution is to re-create the training set again using dataset_and_train.py or alternatively using the train dataset creation procedure already described (more complex but more precise), and then, re-export the model by training it on new intercepted data.
This is needed otherwise http normal request will be recognized as anomalies because of different duration times captured on another system.
Create dataset and train
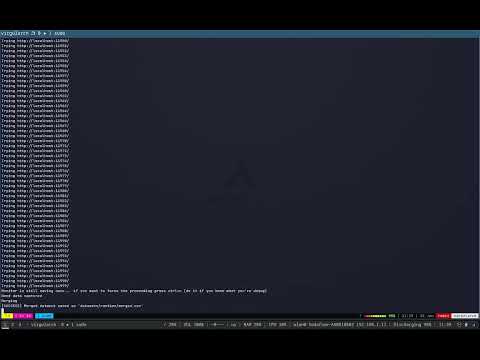
sudo python3 dataset_and_train.pyTip
If you have processes running on localhost which may interfere with the capture and you notice that the bad.csv or good.csv monitor loop does not exist, you can force to continue by pressing ctrl+c. bad.csv and good.csv should have at least 12k data points per file.
sudo python3 detector.py- The detector uses
interceptor.pyto monitor session packets. injector.pysimulates normal HTTP traffic with occasionalNMAPscans (10% probability).- If at least 30% of session packets are flagged as anomalies, the system will detect an ongoing
NMAPattack.
Tip
When running the script, a log file containing all events called logs is created in the main project directory.
Warning
Some other connections directed to localhost interface may be callected in the process. Actually this gives a real scenario perspective of the problem.
https://www.youtube.com/watch?v=Nsazb0cxeR8
pyshark