This repository was archived by the owner on Feb 18, 2024. It is now read-only.
Running a server
When you have created a server you will see the following view:
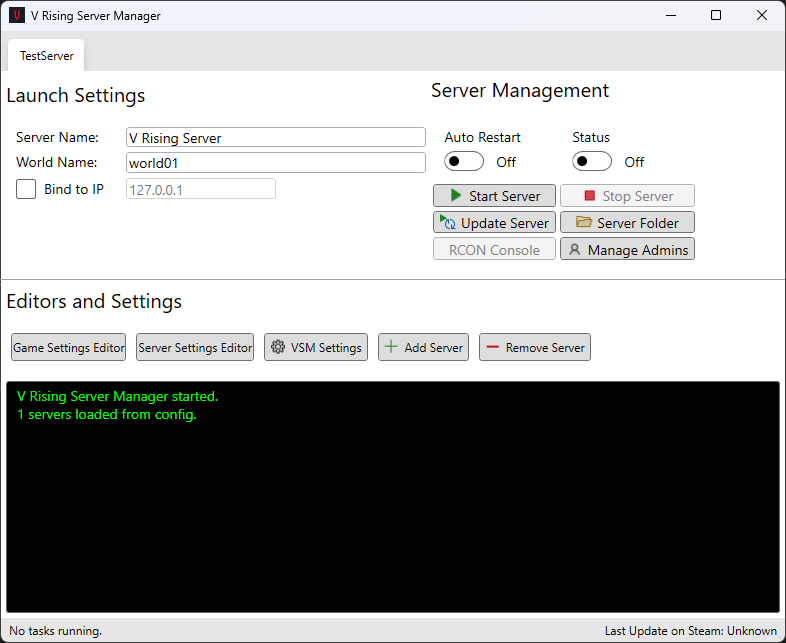
At the top left is a tab menu where each server will be visible that you create. All controls under Launch Settings and Server Management are for the selected server only.
The first recommended step is to click Update Server. This will install and update SteamCMD if it is not already installed and then install the server.
-
Server Nameis the name that you want to be shown in the in-game browser for the server or at sites like BattleMetrics. -
World Nameis the name of the folder for the save data. This can be found in\SaveData\world01in the shown example. There is no need to change this unless you know what you are doing. -
Bind to IPcan be enabled if you want to bind the server to a specific address. The text field next to it is the IP that you want to bind the server to. You do not have to change this unless you know what you are doing.
Under Server Management there are a few buttons to manage your server.
-
Auto Restartcan be ticked if you want the server to automatically start again if it exits in an unexpected way (e.g. it crashed). -
Statusis not interactable and shows if the server is running or not. -
Start Serverstarts the server. -
Stop Serverstops the server. -
Update Serverupdates the server. -
Server Folderopens the folder the server is installed to. -
RCON Consoleis temporarily disabled. -
Manage Adminsopens a window where you can add and remove admins.
When you are ready, proceed to Settings Editor.